Perforce Programming Workflow
§ Who Is This For?
- Programmers are usually required to connect to project's version control
- This walkthough is also suitable if
- You need to make a lot of changes, some of which are made automatically by the engine / third party software like FMOD
- You need to ignore files on Perforce
- If none of this fits you, check out the art workflow walkthrough.
§ Installation
-
Install the P4V client, this is like installing Git + GitHub Desktop locally
- Ask your server admin for the server link and user credentials
-
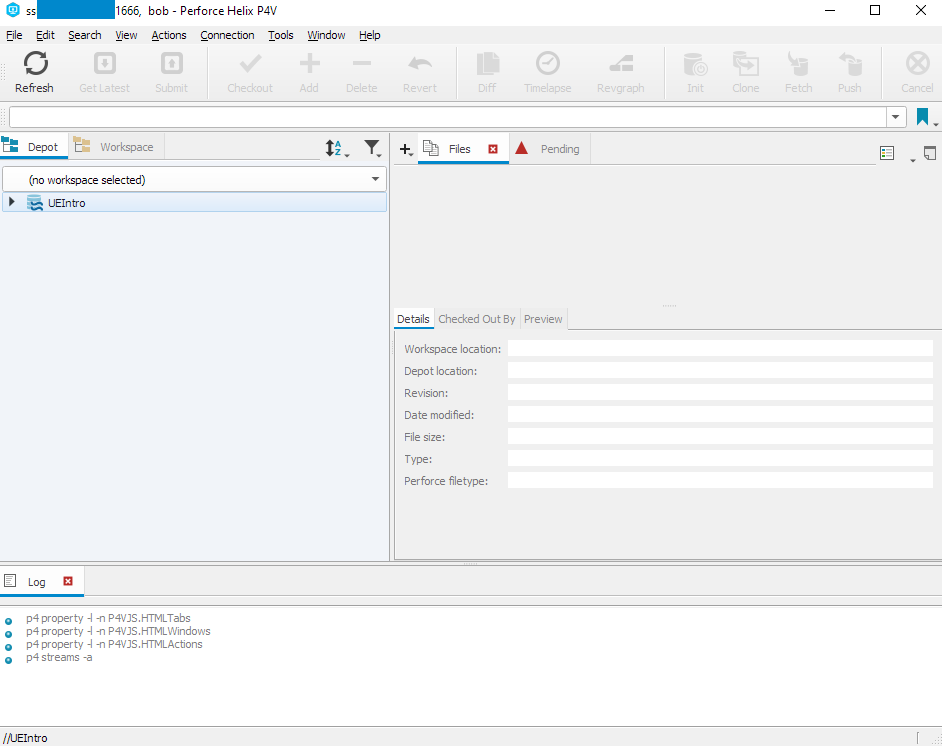
Open P4V, fill in your server and credentials (you can leave workspace blank)
-
P4V should look similar to below
- A Depot is like a GitHub repository, where different versions of files and branches are stored
- A Workspace is a folder on your computer managed by Perforce
- A Stream is like a Git branch
- A Changelist is a list of actions that updates the server once submitted. They can have descriptions just like commits having messages on Git.
-
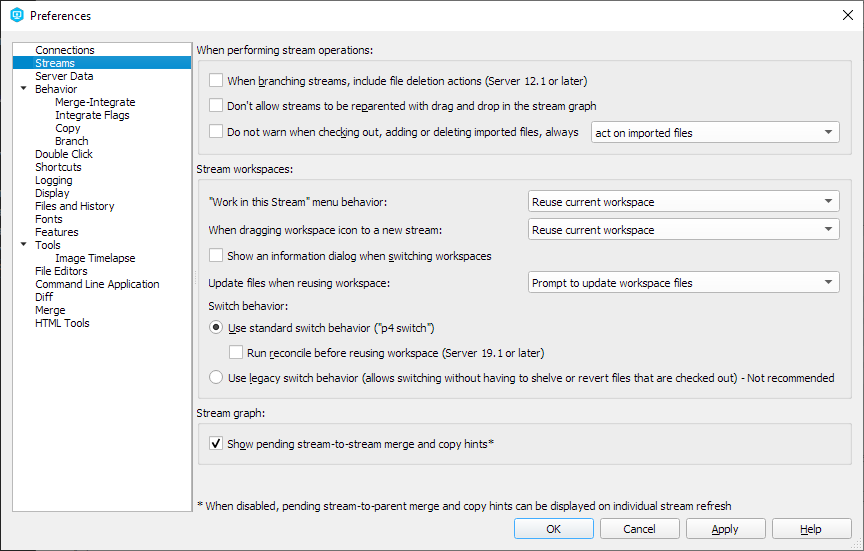
To make Perforce workspaces behave more like Git folders, the "Work on Stream" behavior needs to be changed in preferences (otherwise it will create a local copy of every branch you work on, quickly going over the 20 workspace limit)
-
On the top bar, select
Edit/Preferences/Stream- Select
Reuse current workspacein"Work in Stream" menu behaviorandWhen dragging workspace to a new stream
- Select
-
You are now ready to create your stream and workspace!
-

Perforce provided this cheatsheet for commandline tools if you are interested. However you could do most of these on the visual P4V client. If you do happen to work on the
p4commandine client, be careful that it requires you to log in through that commandline separately from any existing P4V connections you are alread in.
§ Creating Streams and Workspaces
-
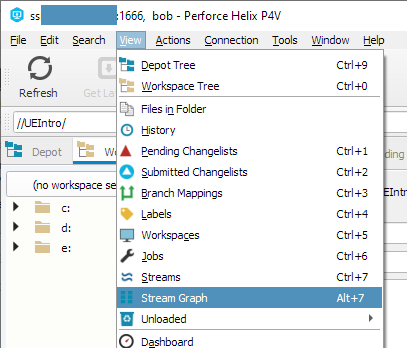
On the top bar, select
View/Stream Graph -
Depending on your team, you may or may not need to create a stream from the project depot. If not, skip to the next bulletpoint.
-
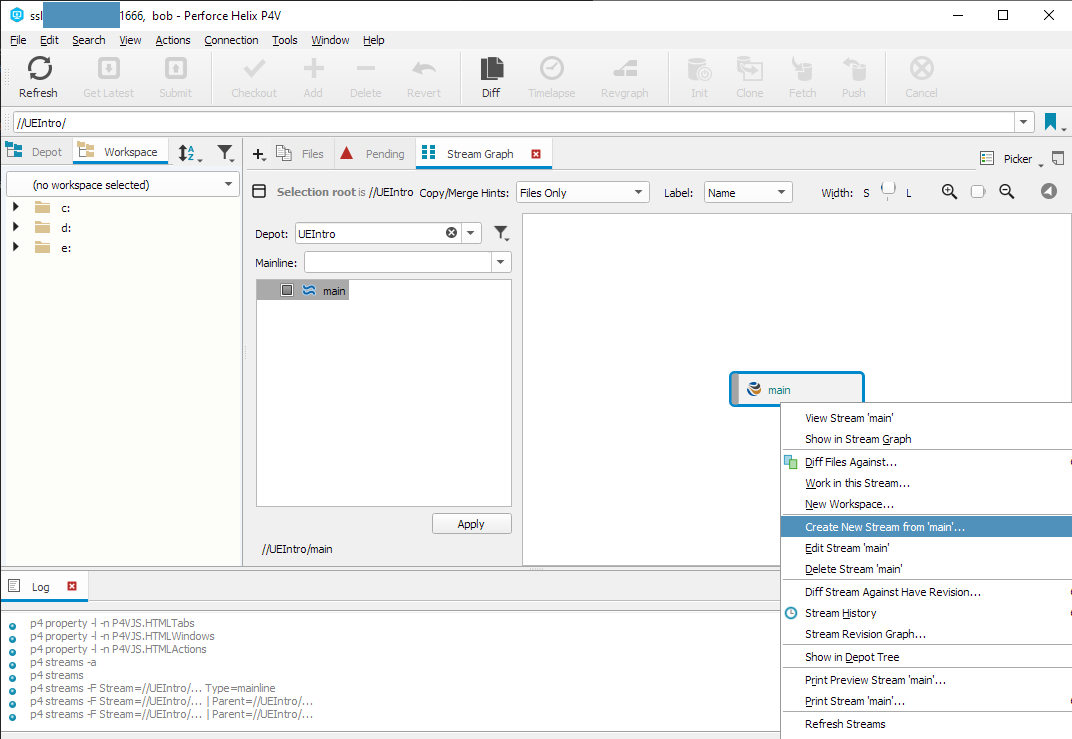
Right click the
mainbranch to and chooseCreate new stream from 'main' -
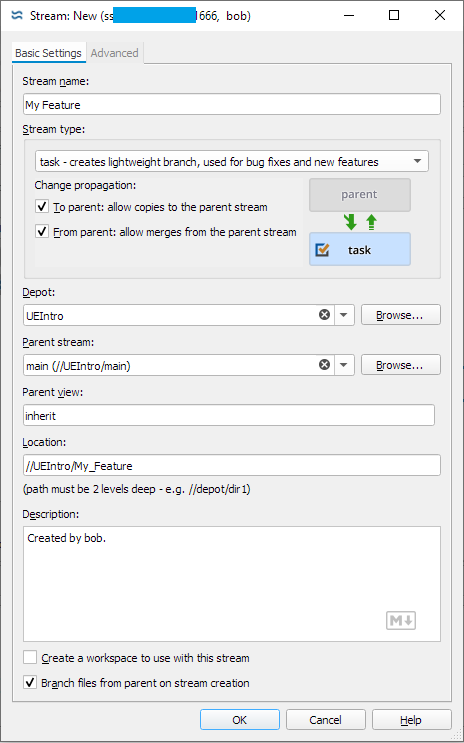
Select
tasksas the stream type and fill out relevant fields, and check theBranch files from parent on stream creationoptionYou can add files to ignore in the
Advancedtab. Perforce ignore works more or less the same with Git ignore. If you have a generated.gitignorefile for the project you can just paste it in.Note that for Perforce file ignoring is local, meaning what you ignore will not affect others.
-
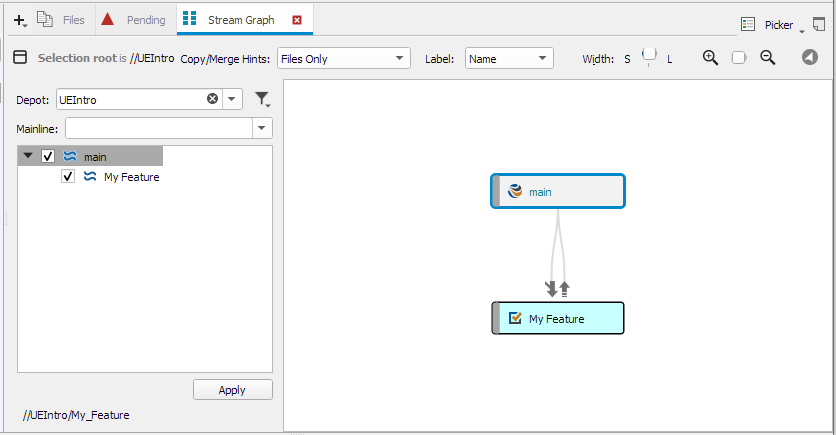
Verify that the stream has been created
-
-
Open a local workspace connecting to the feature branch
-
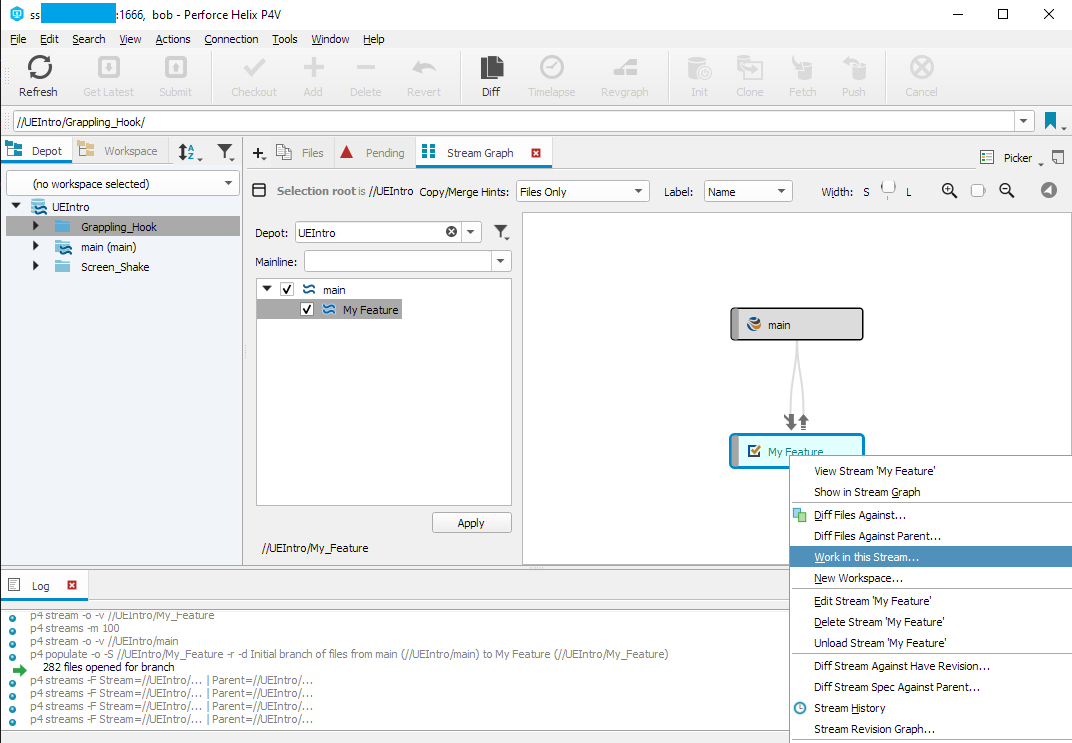
Right click on the feature stream and select
Work on the Stream. Relevant behaviors have been set in the previous section -
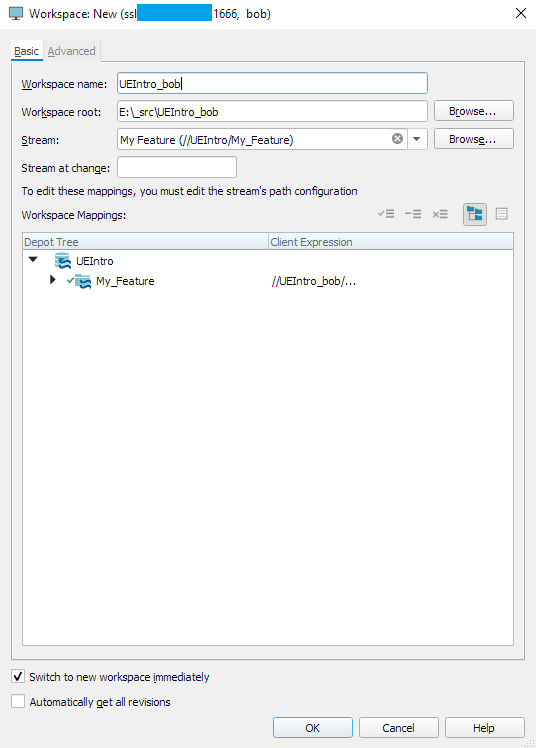
Fill in relevant fields and create the workspace
- Here if you use the same name as the depot itself, Perforce will give you a warning
-
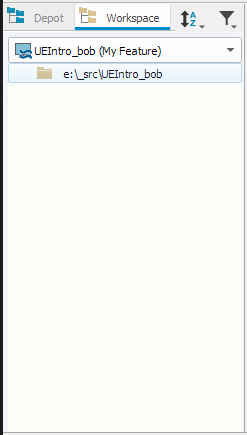
Check the
Depottab on the left to see that the workspace has been created -
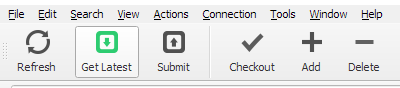
Below the top bar, select
Get Latestto download project files
-
-
You can now launch the project from the project files!
§ Ignoring Files
- P4's ignore mechanism is similar to Git's
.gitignore - The syntax of P4's ignore files is very similar with Git's ignore files, it is possible to just use an existing
.gitignorefor P4 - Related resources:
- Toptal's very well maintained gitignore generator and a sample for UnrealEngine alone (remember to add Mac support if anyone on the team uses a Mac)
- FMOD's generated gitignore file for related content. In newer versions of the plugins it is typically included as an instruction in the engine integration steps.
- Generally, ignore folders called
BuildandBuilds, as well as files called*.log
§ In-Project Ignore Files
- This is exactly the same as Git, just add the
.P4IGNOREfile inside a project folder and it will ignore based on relative paths to that folder- If this doesn't work, do
p4 set P4IGNORE=".p4ignore"and check again - You can check whether it works by navigating to the folder on commandline and do
p4 ignores -v. This should list all the files that Perforce ignores in the current folder.
- If this doesn't work, do
§ Local Ignore Files
Use case: for some reason, you want to ignore files on your own computer without making changes to the shared
.P4IGNOREfiles
- This has to be done on the commandline
- Run the following commands
p4 set P4USER=<your username>p4 set P4PORT=<your port>p4 loginp4 set P4IGNORE=/path/to/your/ignore/file
- Registering multiple ignore files
- separate with semicolons
p4 set P4IGNORE=/path/one;/path/two
- Run the following commands
§ Committing Changes
-
On P4V you can mark files/folders for addition and deletion. This is not actually recommended because
- You might miss files added
- If you deleted something outside P4V, you can no longer mark them for deletion since they don't show up in the UI at all
- You might want to examine all changes before adding to the changelist
-
Instead what is closest to
git add .is reconciliation- Reconcile means to run a comparison between the server and your local files, and list all changes that are not in the current changelist (commit)
-
To reconcile
-
Select the root folder (or any folder if you want a partial reconcile) in the
Workspacetab -
On the top bar, select
Actions/Reconcile Offline Work -
Notice that the deleted filesshow up in the
Depot files missing from workspaceportion -
You can check/uncheck each changed file to decide if they should be on the changelist. Personally I think the best practice is to just accept all changes then
Revertunwanted changes inside the changelist
-
-
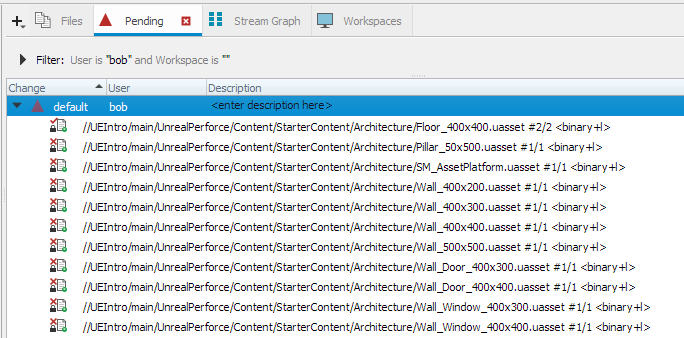
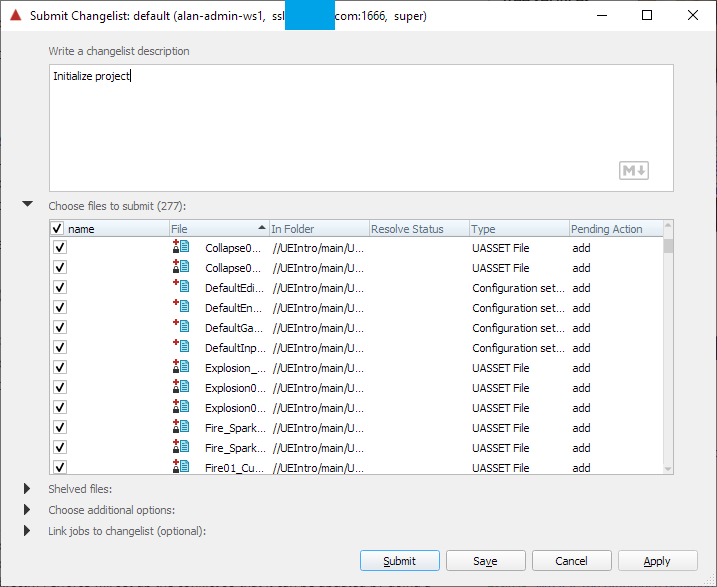
Back to P4V's main page, on the
Pendingtab you can view all changes you made since the last changelist- On each change, you can right click to
Revertit- For added files, you can choose to delete then when reverting, or keep the local version but not commit yet
- For deleted files, reverting the deletion adds them back to the local folder
- On each change, you can right click to
-
Select the changelist (the row with the triangle sign) and select
Submitbelow the top bar. This uploads your local changes to the server.Picture taken from admin walkthrough, exact changes do not correspond to previous reconciliation example.

§ Merging Changes
-
Give your admin a notice that your feature branch is ready to merge. On GitHub this is done through pull requests, but since Perforce (at least Helix Core) does not support it directly, you will need to ping them somewhere else.
-
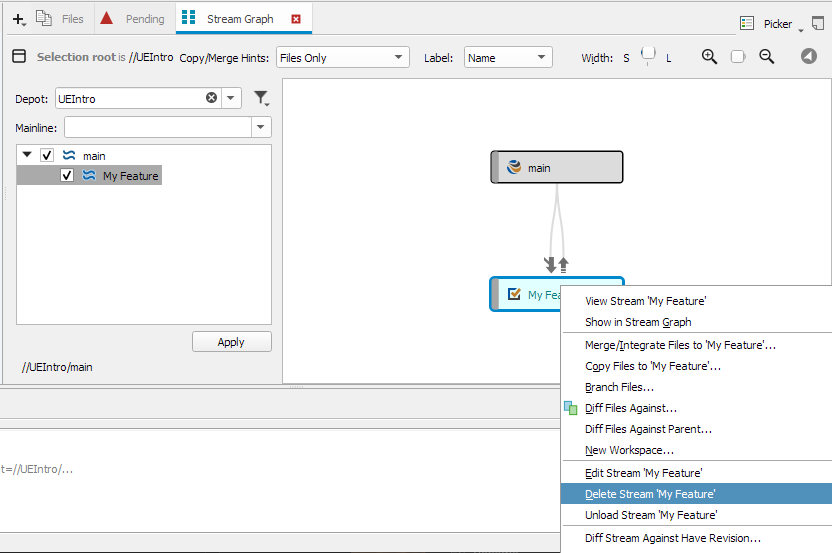
If the merging goes through, the task stream you created can be deleted on the
Stream Graphtab if it is not needed anymore. This is generally good practice as it saves server space.- You will need to switch to the main stream first by right clicking and selecting
Work on this stream
- You will need to switch to the main stream first by right clicking and selecting
§ Closing a Workspace
- Your team might ask you to close your local workspaces if they are getting over the workspace cap for the free Perforce license
- A workspace can be closed in the
Workspacestab (top barViews/Workspaces)
§